By Township Canada
Unlimited API Keys - Separate Dev, Staging, and Production
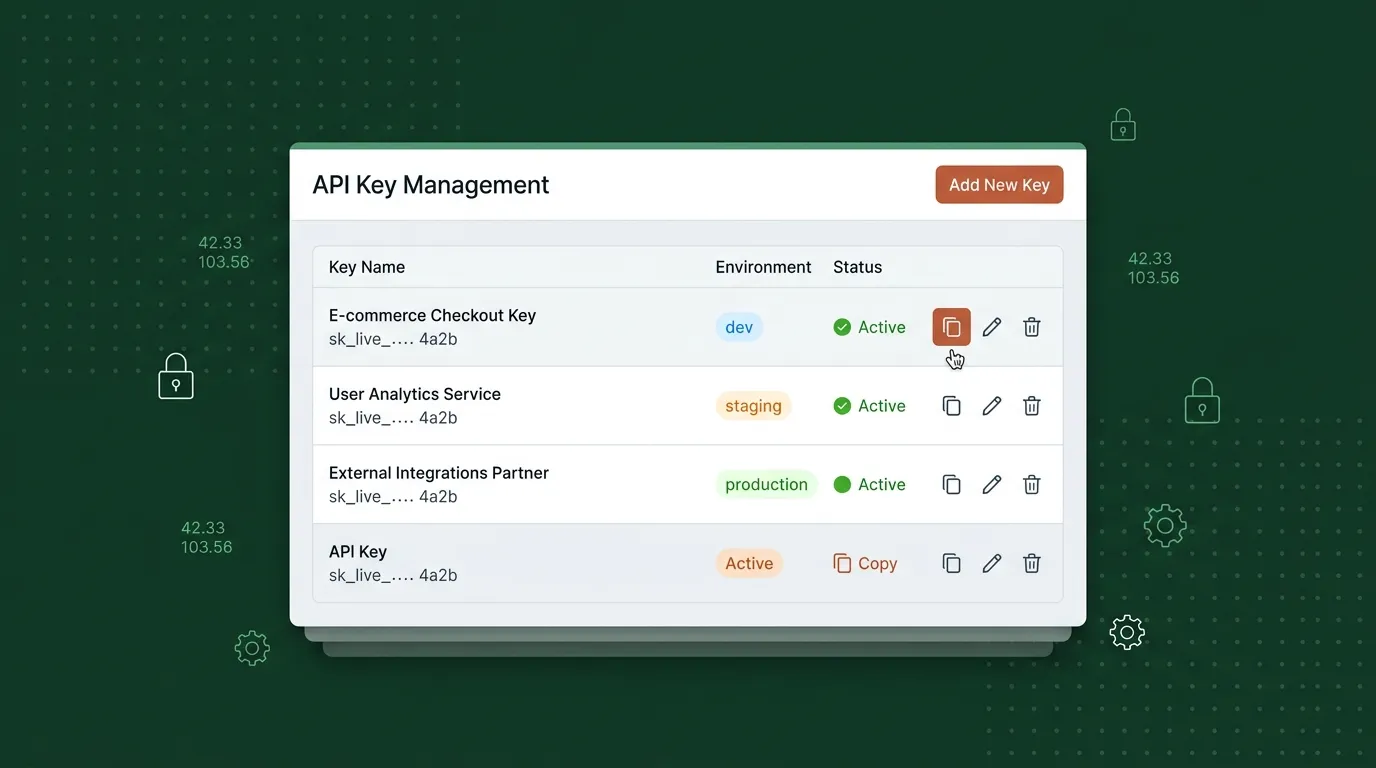
Create multiple API keys for different environments and applications. Name them, monitor usage, and revoke them individually.
You're building an internal tool that converts legal land descriptions using Township Canada's API. You've been developing locally with the same API key that runs in production. It works - until your staging environment runs a batch test that burns through your monthly quota, or until a developer accidentally commits the key to a public repository and you have to regenerate it. Regenerating breaks production immediately because both environments use the same key.
This is the kind of problem a single API key creates. The new Township Canada gives you unlimited keys.
One Key Per Environment
With unlimited API keys, you create a separate key for each environment in your stack:
- Development - A key for local development that you can reset freely without affecting anything else
- Staging - A key for your test environment, where integration tests can run batch conversions without touching production quotas
- Production - Your live key, protected and monitored, used only by your deployed application
If a key is compromised, you revoke that one key. Your other environments keep running.
How It Works
Open your account settings and go to the API keys section. Create a new key, give it a name like "Production - Well Mapper App" or "Dev - Local Testing", and copy the key into your environment variables. Each key shows its creation date and last-used timestamp, so you can see at a glance which keys are active and which haven't been used in months.

Keys are created instantly. There's no approval process, no waiting period, and no limit on how many you can create. Need a key for a quick prototype? Create one, test your idea, delete the key when you're done.
Key Management Best Practices
A few patterns that work well for teams building on the Township Canada API:
Name keys descriptively. "Key 1" and "Key 2" tell you nothing six months from now. "Production - Pipeline Tracker v2" and "Staging - Pipeline Tracker v2" make it obvious which key is which.
Rotate keys periodically. Create a new production key, update your deployment, confirm it works, then revoke the old key. This limits the window of exposure if a key was ever leaked.
Use environment variables. Never hardcode API keys in source code. Store them in .env files (excluded from version control), CI/CD secrets, or your cloud provider's secret manager.
Delete unused keys. If a project is decommissioned or a developer leaves the team, revoke their keys. Fewer active keys means a smaller surface area to monitor.
What You Can Build
The Township Canada API includes four main endpoints:
- Search API - Convert a single legal land description to GPS coordinates, or reverse-geocode coordinates to a legal land description
- Autocomplete API - Get real-time suggestions as users type legal land descriptions or place names
- Batch API - Submit hundreds or thousands of legal land descriptions and get coordinates back in bulk
- Maps API - Access vector tile layers for Canadian survey grids (township, section, quarter section, LSD) to display on Mapbox, MapLibre, OpenLayers, or other mapping libraries
Each key works across all endpoints. There's no per-endpoint key restriction. For a walkthrough of what each endpoint does and who uses it, see Building with Canadian Land Data.
For Teams
On Business plans with team management, API keys are visible to team administrators. A team lead can see all keys created by team members, monitor usage, and revoke keys if needed. This gives organizations control over how their API access is managed without requiring every developer to share credentials.
Getting Started
API keys are available on all paid plans. Create your first key in your account settings, and follow the API integration guide to make your first call. If you're building in TypeScript, the townshipcanada npm package takes your API key in the constructor and handles the rest. Full API reference and code examples are on the API documentation page.